Chunk 1 – Building the frontend
Create and deploy a cloud-hosted website at a live URL that anyone can access.
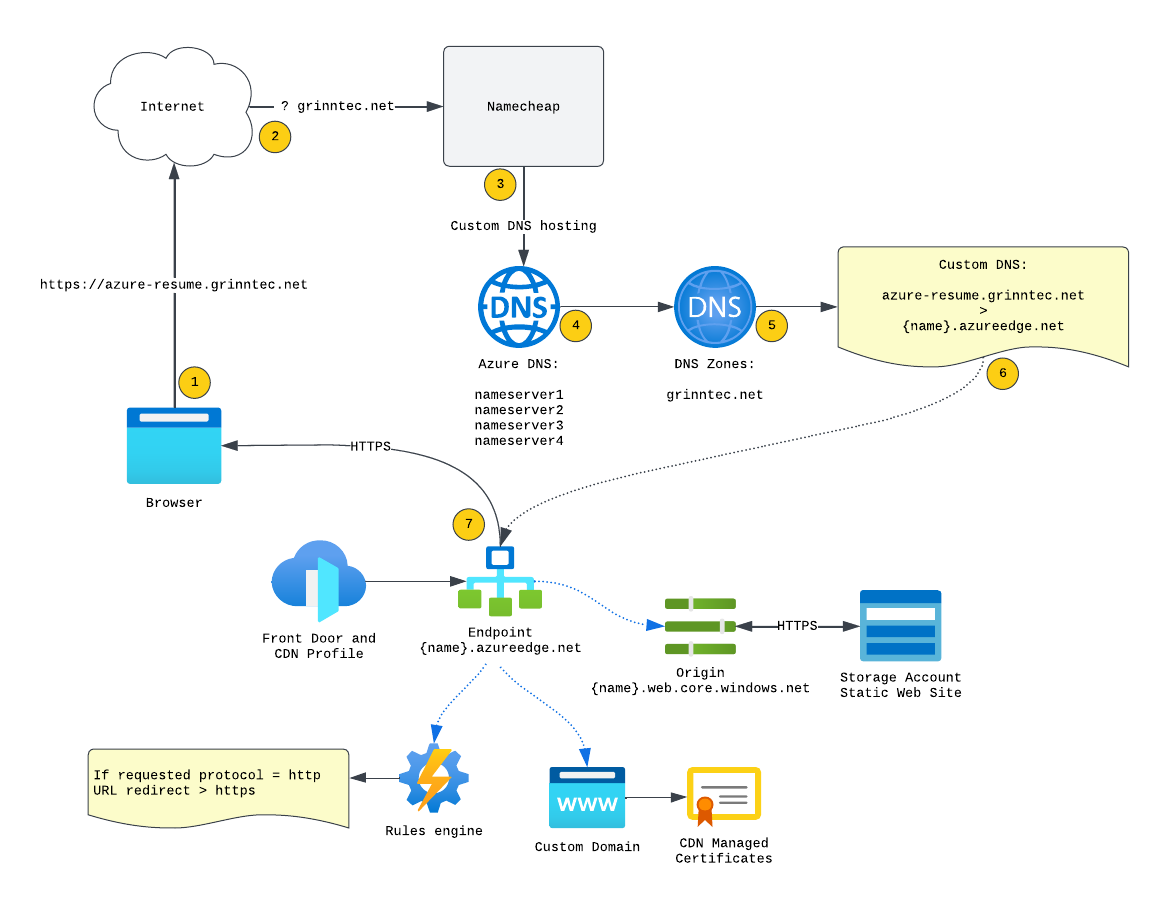
🧱 Steps 2–6: Front-End Development
- Create a website: Build your resume site using HTML
- Style the website: Enhance the design with CSS
- Host the website: Deploy it on a cloud-based static website service
- Secure with HTTPS: Enable SSL/TLS encryption for secure access
- Custom domain: Publish the site using a domain you own
🔐 Security Mod: Protect your DNS configuration from man-in-the-middle attacks using DNSSEC
☁️ Hosting a Static Website
Both Azure Storage and AWS S3 support static website hosting. Instead of using a traditional web server, you store and serve your website files directly from a cloud storage service. This is ideal for sites that don’t require server-side rendering.
Steps to Host:
- Create a storage account or S3 bucket
- Enable the Static Website Hosting feature
- Upload your HTML, CSS, and JavaScript files
- Access the site via the provided storage URL
- Configure:
- Custom domain name
- SSL/TLS encryption
- Access control policies
💡 Real-World Notes
📦 PaaS Web Services
In production, I’d typically use Azure Web Apps or AWS Amplify to host static sites. These services are easier, faster, and more cost-effective than using storage accounts.
My personal site (grinntec) is hosted this way on Azure.
But the point of this challenge is to learn new things and expand my horizons.🛠️ Shell vs IaC
For this challenge, I used: -Azure PowerShellandaz CLIfor Azure
-AWS CLI v2 with SSOfor AWS
These manual steps help reveal how the cloud components fit together.
In a real-world scenario, I’d use Terraform and CI/CD pipelines, relying on CLI only for direct interactions.